Simple and complex fill patterns.
As the graphical performance capabilities of modern PC hardware increases, users come to expect richer colors and themes in their applications. To meet this need, SRP Computer Solutions, Inc. now offers the Color Fill type.
Color Fills benefit you by providing a huge variety of effects and colors using only a single string. This means that any property designated as a Color Fill supports the following capabilities.
Simple Color
Color Fills can simply be a single Color. This allows for backward compatability with older versions of the SRP OLE Controls:
// Use a simple Color, in this case, the HTML color red
ColorFill = "Red"
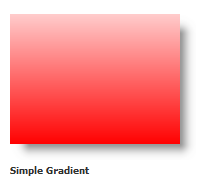
Simple Gradient
Simple Gradient style Color Fills are an easy way to add depth to your control themes. Simply pass a string with the following format:
Gradient(Color, Color)
Color is any acceptable Color value. The gradient will fade vertically from the first Color to the second Color--top to bottom:
 // Use a simple gradient to fade from light red to normal red
ColorFill = "Gradient(Red L=90, Red)"
For horizontal gradients, read below.
Complex Gradient
Complex gradients provide you with more freedom and flexibility. Complex gradients must be one of the following formats:
Vertical(Gradient, Gradient, ..., Gradient [, Border] [, Margin] [, Rounded])
Horizontal(Gradient, Gradient, ..., Gradient [, Border] [, Margin] [, Rounded])
Both formats are identical in structure with the only difference being the name Vertical or Horizontal. As you may have guessed, the Vertical function will create a complex vertical gradient while the Horizontal function will create a complex horizontal gradient. Each Gradient parameter specifies a single two-color gradient, and you can specify any number of them. The Border, Margin, and Rounded parameters are optional and explained in further detail below.
Let's start with the gradient parameter. It has the format:
Gradient(Color, Color [, Size])
As you can see, it's slightly different from the Simple Gradient format discussed earlier. There is the addition of an optional Size parameter, which we will discuss in detail later. For now, let's focus on the ability to use multiple gradients. Each gradient has only two colors, a start color and an end color. If, however, you want to fade from red, to light red, and back to red, you need three colors, which the Gradient format does not accomodate. But you can do this using two gradients, one that fades from red to light red and one that fades from light red to red.
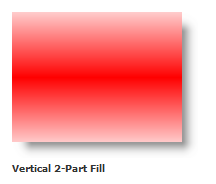
When you specify multiple gradients, the fill space is divided equally into as many parts as there are gradients. So, if you use two gradients, the the fill space is divided into two parts. Three gradients will divide the space into three parts, and so on. Let's illustrate this with an example. Here is a complex vertical gradient with two Gradients, so the fill space will be divided into two parts. The first gradient, red to light red, will fill the top half. The second gradient, light red to red, will fill the bottom half:
 // Build a '3-color' gradient
ColorFill = "Vertical(Gradient(Red L=90, Red), Gradient(Red, Red L=90))"
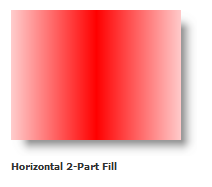
To make your complex gradient horizontal, you simply replace Vertical with Horizontal:
 // Build a '3-color' horizontal gradient
ColorFill = "Horizontal(Gradient(Red L=90, Red), Gradient(Red, Red L=90))"
Gradient Sizes
As noted earlier, there is an optional Size parameter for Gradients. This parameter can be a positive whole number or percentage.
Whole numbers are interpreted as pixel sizes. So, a value of 100 tells the Color Fill that the Gradient is to be 100 pixels tall or wide, depending on the direction.
Percentages are interpreted as a precentage of the drawing space. To distinguish a percentage from a whole number, append the % character. So, "30" will be interpreted as 30 pixels while "30%" will be interpreted as 30% of the drawing space.
When a size is omitted, the gradient is considered to be autosized. Autosized gradients simply share the space unused by fixed and percentage sized gradients.
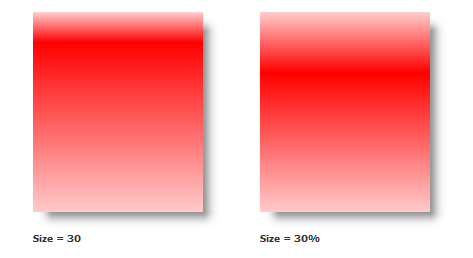
Here are some examples to illustrate the use of the Size parameter. Lets take our previous 2-part vertical gradient and apply a size to it. The first one will be set to 30 pixels while the second one sets it to 30%. A side by side comparison will show the difference:
ColorFillFixed = "Vertical(Gradient(Red L=90, Red, 30), Gradient(Red, Red L=90))"
ColorFillPercent = "Vertical(Gradient(Red L=90, Red, 30%), Gradient(Red, Red L=90))"
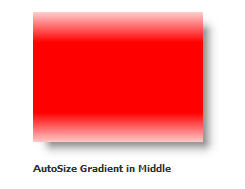
Here is an example where we use a fixed size for the first and last gradients, but allow the middle gradient to fill up the remaining space. Note also that the middle gradient is a single color:
ColorFill = "Vertical(Gradient(Red L=90, Red, 30), Red, Gradient(Red, Red L=90, 30))"
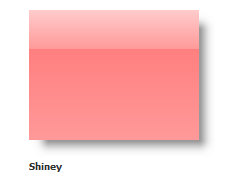
Let's use the Size parameter to do something more interesting. With clever use of gradients and Color modifiers, we can create a shiney looking fill using just the Red color:
ColorFill = "Vertical(Gradient(Red L=90, Red L=80, 30%), Gradient(Red L=75, Red L=80))"
Borders
Sometime the fill may be used as the background to a button or control, so borders become necessary in order to clearly define the edges. This is where the Border parameter comes in. The Border parameter can have one of the three following formats:
Border(Color)
Border(TopLeftColor, BottomRightColor)
Border(LeftColor, TopColor, RightColor, BottomColor)
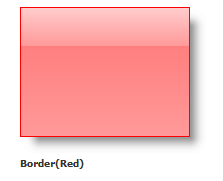
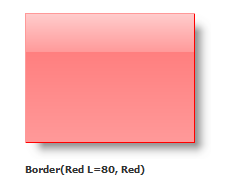
The first Border function takes a single Color value. This function will use the color to create a solid border around all edges of the fill:
ColorFill = "Vertical(Gradient(Red L=90, Red L=80, 30%), Gradient(Red L=75, Red L=80), Border(Red))"
The second Border function takes two Color values. The first color is used for the left and top of the border while the second one is used for the right and bottom of the border. This function is useful for creating thin 3D looking borders.
ColorFill = "Vertical(Gradient(Red L=90, Red L=80, 30%), Gradient(Red L=75, Red L=80), Border(Red L=80, Red))"
The last Border function takes four Color values. This function provides the best in flexibility allowing you to set the color of each side of the border individually.
ColorFill = "Vertical(Gradient(Red L=90, Red L=80, 30%), Gradient(Red L=75, Red L=80), Border(Red, None, Red, None))"
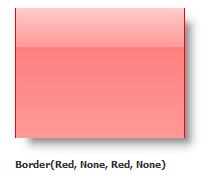
For any Border function, you can pass "None" as the color value, which will omit that portion of the border altogether.
Margins
In the event you do not want the color fill to go all the way to the edges of the object, you can use the Margin parameter. The Margin parameter has two formats:
Margin(Value)
Margin(Left, Top, Right, Bottom)
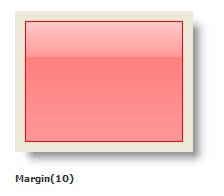
The first Margin function takes a single integer. This function will use the value to create the same margin around all four sides:
ColorFill = "Vertical(Gradient(Red L=90, Red L=80, 30%), Gradient(Red L=75, Red L=80), Border(Red), Margin(10))"
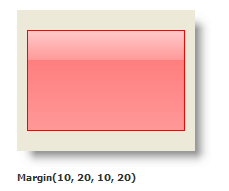
The second Margin function takes four integer values. This function allows you to set the margin on each side of the color fill individually.
ColorFill = "Vertical(Gradient(Red L=90, Red L=80, 30%), Gradient(Red L=75, Red L=80), Border(Red), Margin(10, 20, 10, 20))"
You can use negative margins if you want the color fill to be larger than the object's boundaries, though it means the a portion of the fill will not be visible to the user.
Rounded Corners
To get really fancy, Color Fill technology supports the Rounded function, whose syntax is as follows:
Rounded(Value)
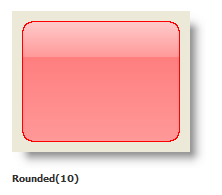
The Rounded function takes a single integer, whose value indicates the width and height of the rounded corner in pixels. For example, a value of 10 indicates that the rounded corner (on all four sides) should be 10 pixels wide and high.
ColorFill = "Vertical(Gradient(Red L=90, Red L=80, 30%), Gradient(Red L=75, Red L=80), Border(Red), Margin(10), Rounded(10))"
Negative numbers are ignored.