Learning how to use a new tool can be intimidating. Sometimes it is helpful to review a general outline of a tool's functionality before jumping in. Hopefully the following typical workflow illustration will help remove some of that new tool anxiety.
Defining a Resource
Developers start by thinking about a resource they want to expose to the internet. A resource can be almost anything, but typically a resource will have a close relationship to a database table in the OpenInsight application. To illustrate, we'll define a resource that relates to a CUSTOMERS database table.
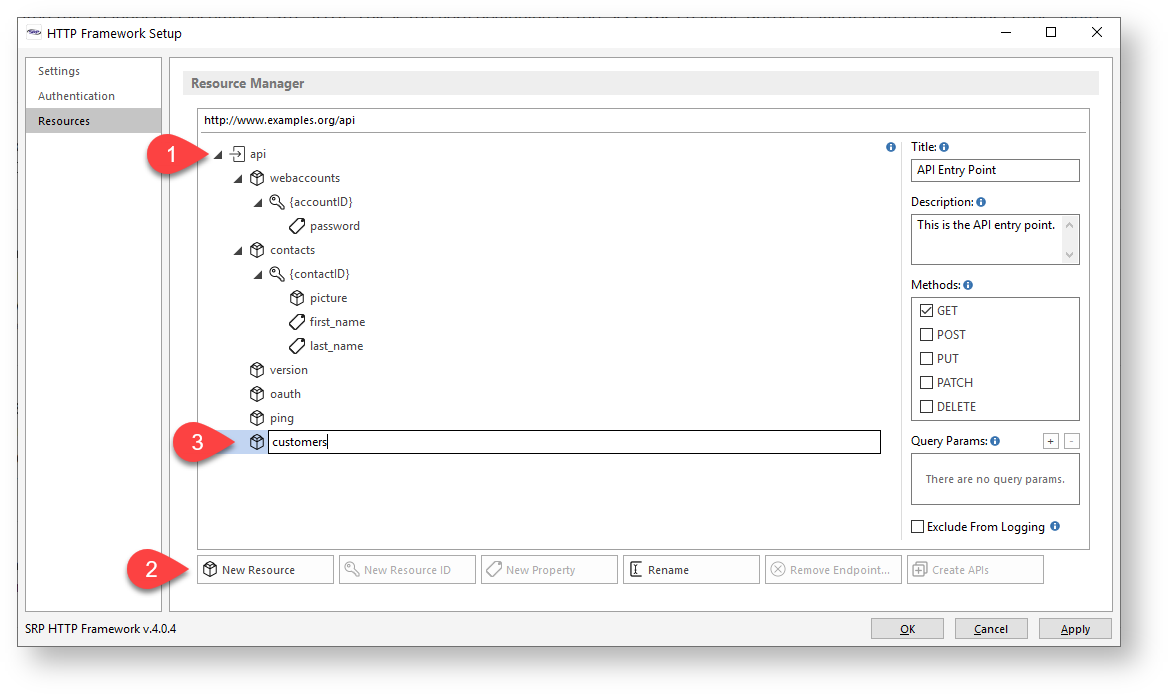
We'll use the Resource Manager to define a resource. Most resources will appear directly underneath the API endpoint (i.e., they are primary resources). To do this we (1) select the api resource node from the Resource Manager tree view, (2) click on the New Resource button, and (3) enter the name of the new resource:
Defining a Resource ID
Is the resource we just defined singular or is it a collection of other resources? In our case, the customers resource is a collection because it represents multiple individual customers, each with their own unique identifier. Therefore, we need to define a resource ID so any specific customer resource can be identified.
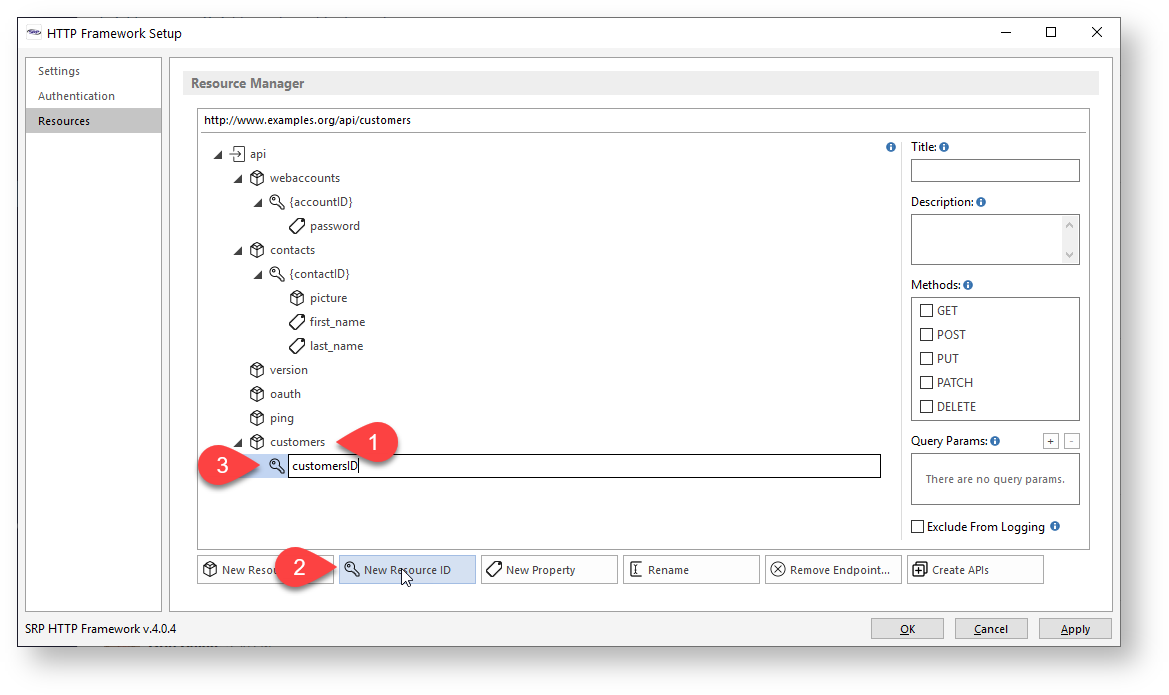
We start by (1) selecting the newly created customers resource node from the Resource Manager tree view, (2) click on the New Resource ID button, and (3) enter the name of the resource ID:
Enabling our Methods
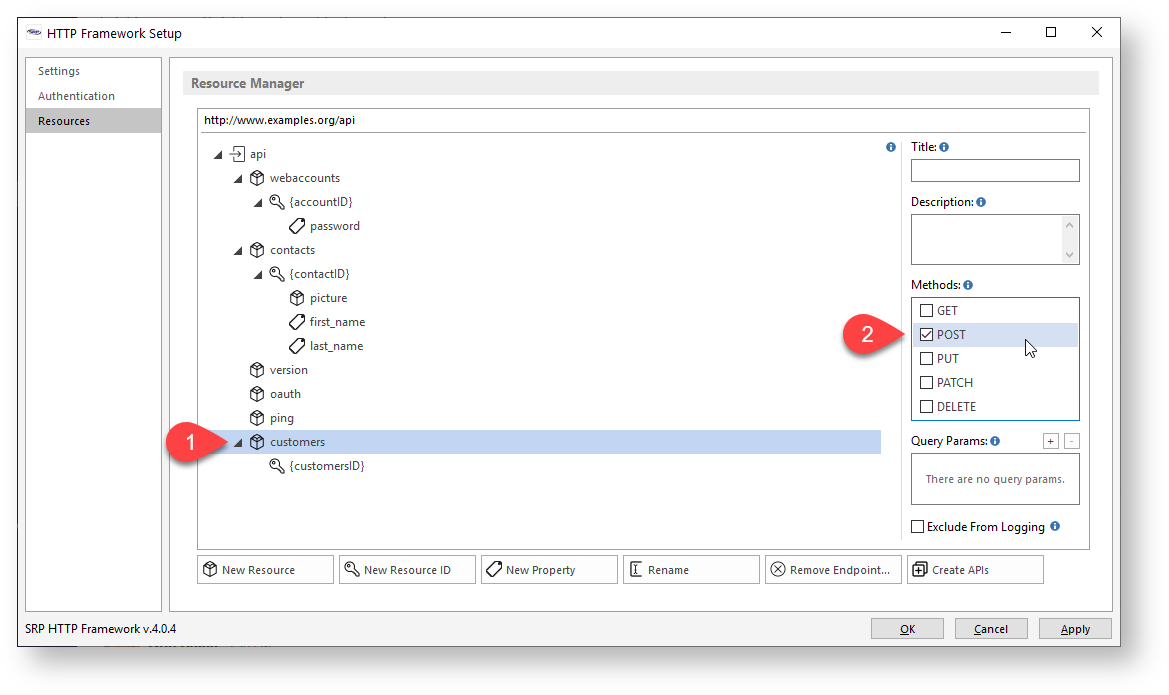
Once a resource endpoint has been defined, we need to define how clients will be able to interact with it by enabling one or more methods. For most database driven resources, CRUD functionality is achieved through the POST (create), GET (read), PUT (update), and DELETE (delete) methods. For our purposes, we'll allow new customers to be created by enabling the POST method for the customers resource endpoint. To do this we just (1) select the customers resource node from the Resource Manager tree view and (2) click on the POST checkbox under the Methods block:
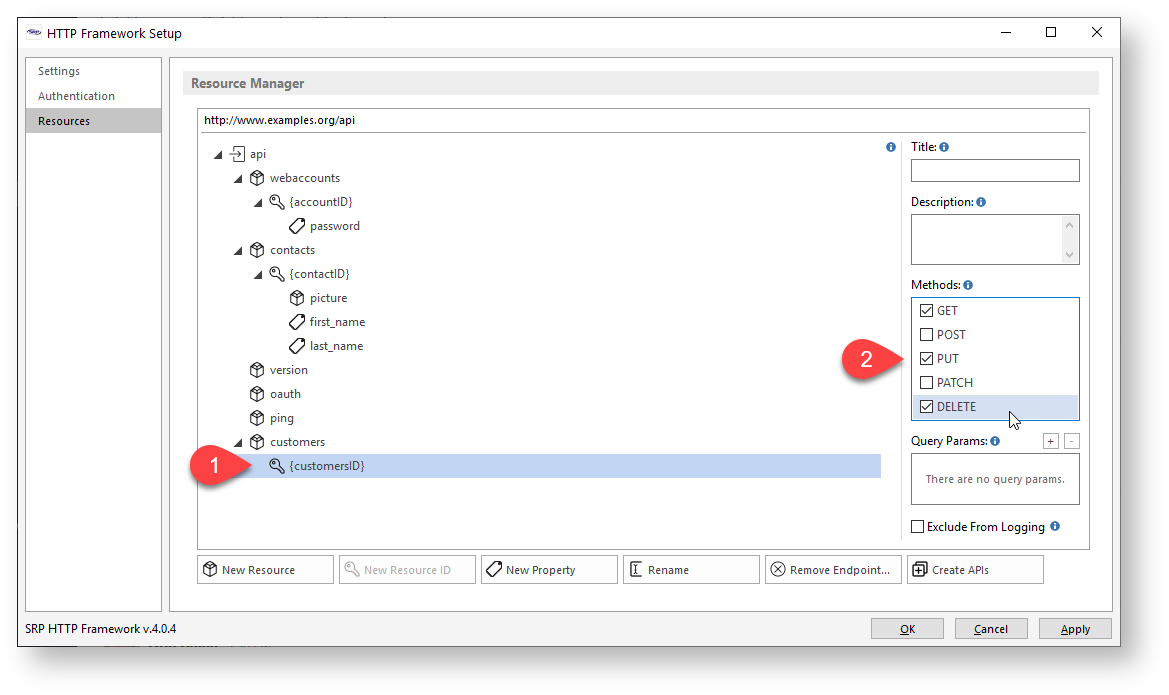
We'll also allow specific customerID resource endpoints to be read, updated, and deleted. To do this we (1) select the customerID resource node from the Resource Manager tree view and (2) click on the GET, PUT, and DELETE checkboxes under the Methods block: