Open Form Designer and create a new form not based on a table. Place a list box control on the form and resize it so it’s big enough to work with. Now, double-click on the list box control to open the properties dialogue box.
To get the hierarchical effect, you need to make sure that the hierarchical list box property is checked. A hierarchical list box usually contains graphical representations of each level contained in a single bitmap. For example, the following single bitmap contains three images. (You can find this bitmap in the \BMPS directory provided with OpenInsight – it’s called REPTYPES.BMP.)

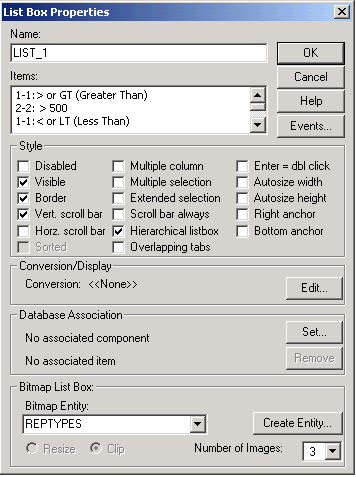
The image number associated with the bitmap is displayed based on the level number in the hierarchy. The blue dot indicates level 1, the yellow and red dot level 2, and the green dot level 3. Set the list box properties as shown below:
For example, to create the hierarchical list box shown above, you would fill in the following in the Items: area.
1-1:> or GT (Greater Than)
2-2: > 500
1-1:< or LT (Less Than)
2-2: LT 15 MAY 1997
1-1:= or EQ (Equal To)
2-2: = "Revelation Software"
1-1:>= (Greater Than or Equal To)
2-2: >= 1000
1-1:<= (Less Than or Equal To)
2-2: <= 1000
1-1:# (Not Containing)
2-2: # "Open Insight"
1-1:[] (Containing)
2-2: ["MAY"] or []"MAY"